
WHAT YOU NEED TO KNOW TO GET YOUR THANG MOVING
FAQs
General
-
Thang is a multi use, electric powered cart controlled by a mobile phone application.
-
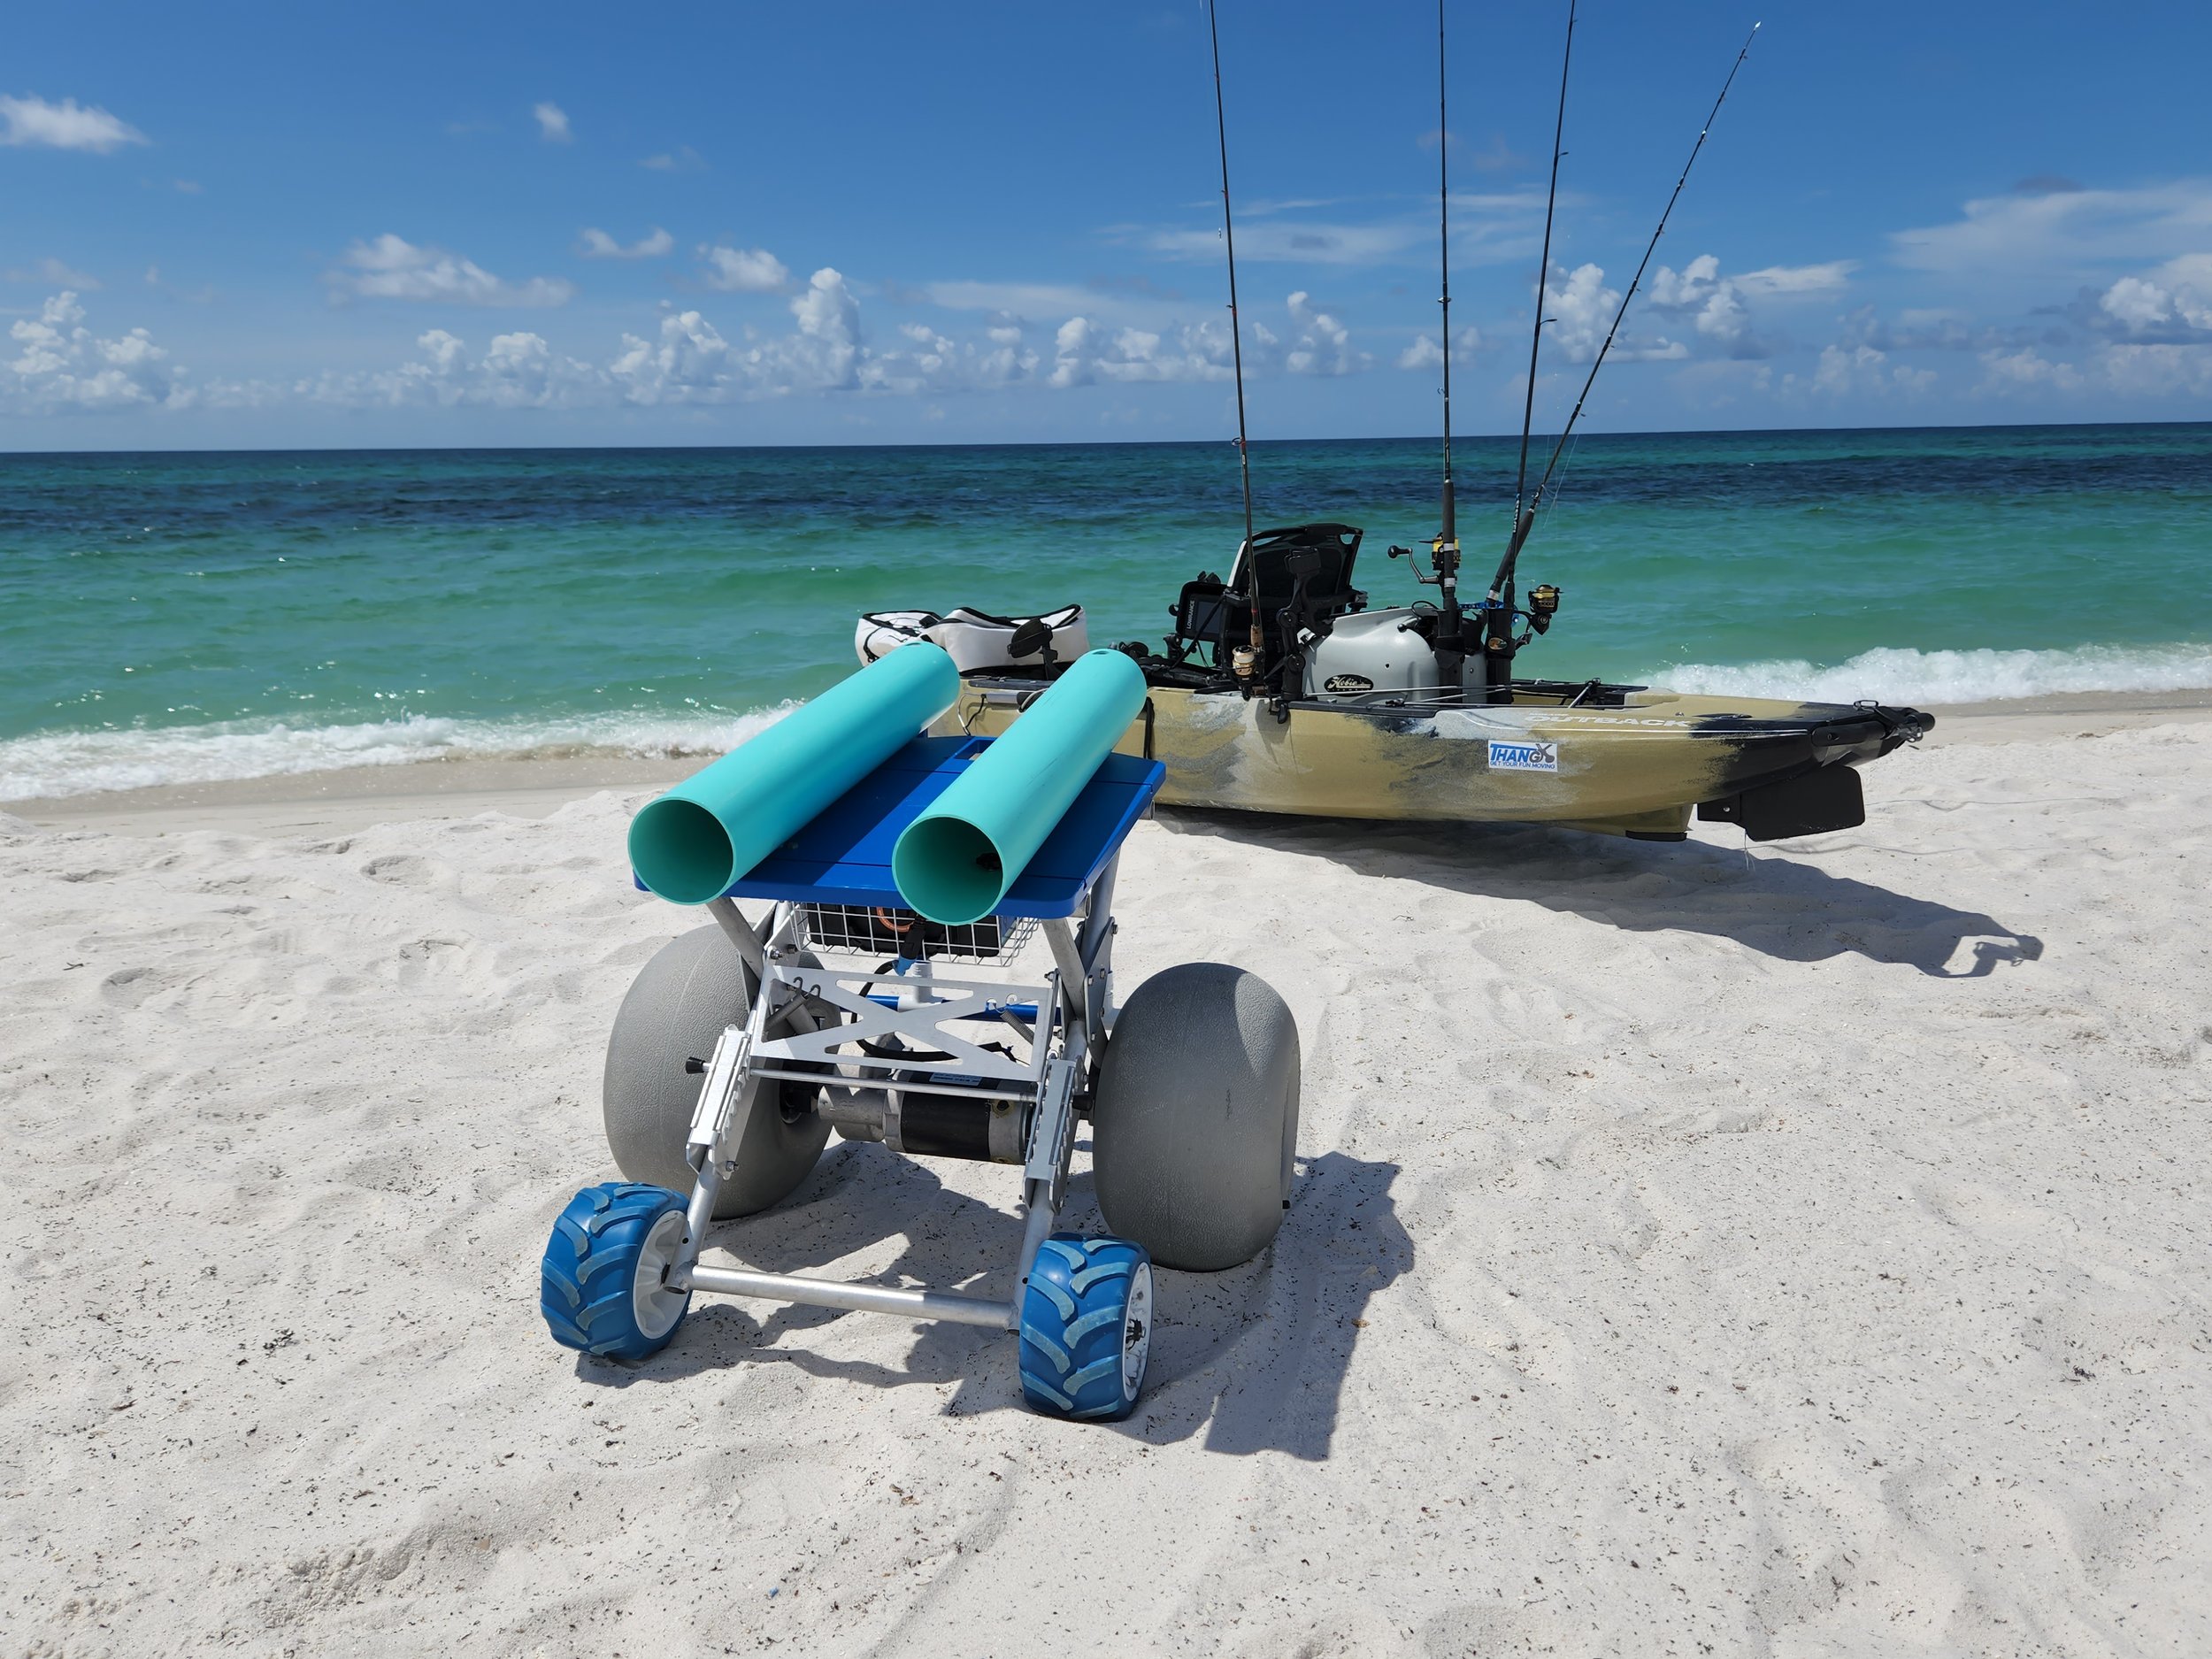
Yak Thang comes with Thang frame and HDPE platform, battery, motor/transaxle, electronics enclosure, two t-rail mounted 3” PVC kayak rails, two 12" balloon tires and two 7" plastic foam tires.
-
We are redesigning Tailgate Thang but do sell the blue plastic 80 quart caryalls and aluminum handles that can be affixed to Yak Thang (after removal of the kayak tubes). If interested in those attachments please use our contact page or email mark.griffith@thang.co directly to inuire.
-
We are producing our new Gen 3 Thangs now. A limited number of Thangs are now available to purchase or rent from our Shop page. We currently have availability for pickup at our shop. For purchases delivery within our local Florida Panhandle area may be arranged. If you find an item out of stock, please submit your email address for the item that is out of stock (on our Shop page) and we’ll let you know as soon as stock becomes available again. For all other inquiries please shoot us a note via the website contact page or the form at the bottom of any page.
-
You may purchase through our online store here at Thang.co on our SHOP page and pick up your order at our Navarre, Florida shop. Delivery is available initially within 100 miles of our shop. Call to arrange pickup or delivery to meet your schedule. We hope to quickly ramp up production after initial availability to serve other areas and offer shipping.
-
Thang has four speeds forward and four backward.
-
Thang is designed to carry up to 175 lbs.
-
Thang’s is designed to safely carry loads up to the maximum weight up even inclines of up to 15 degrees. As a safety note - inclines should not be approached or traversed from the side or at a slant. Always approach and traverse inclines perpendicularly so Thang does NOT lean to the left or right.
-
There is no set limit of kayak length. Thang’s weight capacity is 175 pounds. The thickness of the hull, materials used, length and width of the kayak, and how many attachments or other rigging considerations combine to determine the weight of a fully rigged kayak. An explanation and discussion of these considerations can be found here: https://www.watersportswhiz.com/how-much-does-a-kayak-weigh/
An example of larger/heavier kayas are the Hobie PA 14 (fully rigged - 145 pounds) and the Old Town Sportsman Autopilot 136 (fully rigged 119 pounds).
Smaller lighter kayaks are about 40 to 50 pounds.
-
For Android phones - go to the Google Playstore, search for Thang, then download and install the application. If not found via Play Store search, point your Android phone camera at the Google Play Store QR code on the How to Use page under Support. The QR code url should take you directly to the Thang app download page in the Google Play Store.
For Apple phones - go to the Apple App store and do the same. If not found via Apple App Store search, point your iPh nephone camera at the Apple App Store QR code on the How to Use page under Support. The QR code url should take you directly to the Thang app download page in the Apple App Store.
-
Thang dimensions (H x L x W) are:
Collapsed (frame only) - 13.5" x 28" x 31". Large wheel option - 13.5” x 31” x 31”
Extended ( frame only) - 20" x 23" x 31". Large Wheel Option - 20” x 26” x 31”
Electronics Enclosure - 4.25" x 10" x 9.75"
Extended (with electronics enclosure & platform) - 21" x 28" x 31". Large Wheel Option 21” x 31” x 31”
Thang weights are:
Motor/Frame - 36.8#
Platform, Handle, Basket & Connectors - 12.5#
Electronics Enclosure - 5.7# with battery & 2.7# without battery
-
The Privacy Policy page outlines Thang's website and mobile phone application privacy policy.
-
Thang has a one year warranty. We will replace or repair defective frame, motor, motor control circuit card, and platform of Thang units operated under normal recreational conditions. The warranty excludes operation outside of the Thang restricted uses, commercial use, or damage from accidents (e.g. impacts from car wrecks, falling or dropping, etc). Excluded components are wheels, battery, rear axles connecting hardware and attachments. Shipping, postage of delivery charges are the customer's responsibility. Please see our Warranty Page on the website under Support for details.
Use & Care
-
Do not use Thang for uses other than land based transport of equipment and items it is specifically designed to carry.
Close the Mobile Phone Application or navigate the phone application home screen when Thang is not actively being driven.
Do not put your mobile phone in your pocket while the mobile phone application navigation screen is open with a Thang unit connected to the application.
Do not attempt to ride on or transport people or animals with Thang.
Do not operate Thang unattended.
Do not attempt to go down or up stairs with Thang or traverse ramps with large drop offs to the ground - use only on smooth ramps that transition smoothly to the ground or inclines less than 15 degrees.
Do not go up or down hills at a slant or angle. Always approach and traverse inclines perpendicular to the incline.
Do not load kayaks onto Yak Thang by pushing the kayak onto the platform toward the rear wheels - Doing so will damage the hinge and/or bend the axle. Always load kayaks by pushing the kayak toward the motor drive wheels from the rear support wheels if loading with one person.
Do not operate Thang without securing your equipment or load to Thang's frame.
Do not operate Thang with unbalanced loads.
Do not transport loads greater than 175 lbs.
Do not ride in, place or transport children or animals using Thang
Do not submerse Thang.
Do not spray the electronics enclosure or the electronics enclosure wire port entry directly with water, cleaner or other liquids.*
Do not spray the electric motor openings directly with water, cleaner or other liquids.*
Do not operate Thang with a battery or batteries other than those provided or with replacement batteries specified by Thang.
Do not charge Thang's battery with chargers that are not specifically designed to charge lithium ion 24v batteries (i.e. do not use chargers designed to charge lead acid batteries).
Do not leave or store Thang’s electronics enclosure in a non environment controlled area. (If storing Thang in a non heated/airconditioned space such as a garage or shed, unplug the electronics enclosure from the motor and store it separately inside an environmentally controlled space and reattach for the next use).
When transporting a loaded Thang, do not exceed a speed of 3 when traveling on uneven or rough terrain .
When using Tailgate Thang, the 80 quart carry all must be securely attached to the Thang platform connectors using provided hardware.
Do not store your kayak on Yak Thang (to prevent deformation of plastic/molded kayaks).
Store Thang in a dry environment when not in use.
When using Thang, the aluminum frame must be securely attached to the Thang platform connectors with the snap tees secured to the main arm (above the support wheels) horizontal support and spring latch engaged on the rear arm horizontal support (above the drive wheels and motor).
When using Thang to transport kayaks, canoes or other small watercraft, carrying rails must be firmly secured to the platform.
Do not operate Thang if your mobile phone or Thang mobile phone app becomes unresponsive to your finger touches or if rain or water droplets are causing errant mobile app inputs such. This is a function of your mobile phone touch screen sensitivity and may cause dangerous operation in very cold conditions or when rain or other water droplets fall onto your screen during operation.
-
General operational instructions for the Thang mobile phone application which controls the operation of Thang is provided on our How To Use page and under Help on the Thang Mobile Phone Application.
-
To attach Thang’s platform to the frame, hold the platform with the pvc platform connectors facing down. With the side of the platform at the edge of the main arm horizontal frame pipe, lower the left or right pvc connector over the main arm that is located above the support wheels. With the platform tilted, push the pvc connector down over the horizontal frame pipe of the main arm and rock the platform in the direction of the other pvc connector until it is secured onto the main arm horizontal frame pipe. The platform should be centered over the horizontal supports such that when the front arm is extended and the platform is lowered the spring latch engages with the latch hole in the middle of the frame arm.
To remove the Thang platform from the frame, unlock the spring latch and rotate the Thang platform backward from its pvc connectors on the main arm horizontal frame pipe. With one foot on the left or right drive wheel, push the top of the Thang platform to the opposite direction of the drive wheel side where you placed your foot. Use enough impact to pull the pvc connector off the horizontal frame pipe and continue until both pvc connectors are pulled off the main arm horizontal frame pipe.
When using Thang, the aluminum frame must be securely attached to the Thang platform connectors with the snap tees secured to the main arm (above the support wheels) horizontal support and spring latch engaged on the rear arm horizontal support (above the drive wheels and motor).
-
Important Information for Safe Loading and Operation:
When Yak Thang is not traveling disconnect from Yak Thang in the mobile app so you don't accidentally hit the forward or reverse button on the navigation screen.
Thang should be on a level surface when loading with the platform approximately parallel with the ground. For Thang equipped with the standard smaller blue foam support wheels this should be the 2nd position from the top on the collapsible hinge. For Thang equipped with the 1/2” axle and larger 12” beach wheels this should be the 3rd position from the top on the collapsible hinge.
Before moving Yak Thang loaded with your kayak, secure your load to Yak Thang. Use an elastic or cinch strap secured to the Yak Thang metal frame on the left and right side of the Yak Thang and over the top of the kayak (or two straps attached from both the left and right side of the Yak Thang Frame to the kayak at sturdy attachment points on the kayak). The straps should be cinched or stretched tight to secure the kayak to the frame before traveling. Note a hole is provided in the top center of the left and right arm joints and provide a convenient attachment point for the hook end of straps. Do not strap the load to the blue HDPE platform only - use the metal frame arms or the arm joints to secure the load.
Never push your kayak onto the Yak Thang platform in the direction from the drive wheels to the small wheels. With heavy loads this could cause your adjustable hinge components to bend or break. Always load while sliding the kayak hull along the support tubes toward the front drive wheels.
The majority of the weight should be over the motor and drive wheels with the center of gravity just forward of the drive wheels (opposite the direction of the support wheels). When properly loaded the kayak should sit evenly from left to right Thang’s platform and either balance parallel with the ground or tilt slightly forward of the drive wheels.
Two person load from ground:
Disconnect the mobile app from Yak Thang. With one person on each end of the kayak, lift the kayak and place on top of the pvc tubes mounted to the platform such that the kayak sits level and does not tilt backward toward the support wheels. Then strap the kayak to the Yak Thang metal frame securely. Reconnect the mobile app to Yak Thang to navigate.
One person load - bow lift from ground:
Disconnect the mobile app from Yak Thang. Place Yak Thang with drive wheels forward with Yak Thang at a sixty degree angle from center line of the kayak and the Yak Thang small wheels two to three feet back from the bow (front) of the kayak. Lift the bow of the kayak up and move it over the pvc rails setting it down with the kayak centerline resting between the pvc rails and the kayak generally aligned straight with the direction the Yak Thang is pointing. Then standing behind the stern (rear) of the kayak. Lift the stern so the bottom of the kayak hull is above the Yak Thang pvc rails and push the kayak forward to slide the kayak hull over the pvc rails to the point the kayak is balanced and level on Yak Thang and does not tilt backward toward the support wheels. Secure the kayak to the Thang frame and reconnect the mobile app to Yak Thang to navigate.
Loading from truck or trailer:
Navigate or place Yak Thang directly in back of the truck or the trailer, drive wheels facing the truck or trailer and aligned with the centerline of your kayak about four of five feet from the end of your kayak. Disconnect the mobile app from Yak Thang. Pull your kayak straight back off the truck bed or the trailer rails lifting it onto the Yak Thang rails until the center of gravity (typically the seat) is positioned in the middle of the Yak Thang platform. With the weight of the kayak resting on Yak Thang, secure your kayak with straps to the Yak Thang metal frame. Connect the mobile app to Yak Thang, verify the screen display matches the front/back alignment of Yak Thang (drive wheels forward and support wheels backward). Using the arrow keys on the navigation screen move the kayak backward at a speed of 1 until front of kayak is clear of the truck tailgate or trailer rails.
-
Important Information for Safe Unloading and Operation:
When Yak Thang is not traveling disconnect from Yak Thang in the mobile app so you don't accidentally hit the forward or reverse button on the navigation screen.
Thang should be on a level surface when loading with the platform approximately parallel with the ground.
Before moving Yak Thang loaded with your kayak secure your load to Yak Thang. Use an elastic or cinch strap secured to the Yak Thang metal frame on the left and right side of the Yak Thang and over the top of the kayak (or two straps attached from both the left and right side of the Yak Thang Frame to the kayak at sturdy attachment points on the kayak). The straps should be cinched or stretched tight to secure the kayak to the frame before traveling.
Never push your kayak onto the Yak Thang platform in the direction from the drive wheels to the small wheels. With heavy loads this could cause your adjustable hinge components to bend or break. Always load while sliding the kayak hull toward the front drive wheels.
Two person unload to ground:
Disconnect the mobile app from Yak Thang. Remove the straps securing the kayak to the metal frame of Yak Thang. With one person on each end of the kayak, lift the kayak off the pvc tubes mounted to the Yak Thang platform and move the kayak laterally to the left or right of the Yak Thang then slowly lower it onto the ground.
One person unload to ground:
Disconnect the mobile app from Yak Thang. Remove the straps securing the kayak to the metal frame of Yak Thang. With the bow of the kayak facing forward in front of the Yak Thang drive (balloon) wheels, stand at the stern (rear) of the kayak and lift it so that the bow lowers toward the ground. Give a slight push and allow a combination of your pushing and gravity to slide the kayak forward slowly until the underside of the kayak hull at the bow touches the ground. If on grass, sand or other smooth surface you may push the kayak further forward to minimize lifting of the kayak off the Yak Thang platform. Lift the stern of the kayak off the Yak Thang pvc rails and walk the stern to the left or right of the Yak Thang so the entire kayak is clear of the Yak Thang and it's wheels. Slowly lower the stern to the ground.
Unloading to truck or trailer:
Navigate or place Yak Thang with the kayak loaded directly in back of the truck or the trailer, drive wheels facing the truck or trailer and aligned with the centerline of your kayak so that the end of your kayak that protrudes over the drive wheels is about one to three feet from the tailgate or trailer rails. Unstrap the kayak from the Yak Thang metal frame. Verify the screen display matches the front/back alignment of Yak Thang (big wheels forward small wheels backward). Using the arrow keys on the navigation screen move the kayak forward at a speed of 1 while putting slight downward pressure on the end of the kayak furthest from the truck or trailer so that the kayak hull bottom slightly clears the rear of the tailgate or the trailer rails. Stop the Yak Thang with the mobile app when one to two foot of the kayak is over the tailgate or trailer rails. Lift the end of the kayak farthest from the truck or trailer and push the kayak into the truck bed or onto the trailer rails with the kayak completely off Yak Thang. If Yak Thang is still under the kayak after it is loaded use the mobile app to navigate Yak Thang from under the kayak. Disconnect the mobile app from Yak Thang.
-
Yak Thang is equipped with two 3” diameter pvc kayak support tubes that support the base of the kayak. The tubes should be spaced the same distance apart as the center of the tunnels on your kayak and equidistant from the centerline of the Thang platform. On most fishing kayaks this is the distance from the center of the port and starboard scupper holes in your kayak’s deck. The starboard and port support tubes should be placed equidistant from the centerline of the Thang platform.
To do this use a black magic marker to mark the Thang platform on the two routed t-rail slots at the distance noted above for your kayak. Place the provided Powertec T-bolts through the holes in each support tube and secure them with the provided star handle knobs. Leave enough space to slide the flat heads of the T-bolts into the two t-rail slots that run he width of the Thang platform. For each tube place the head of each T-bolt into the outside edge of the slot and slide the support tube onto the platform until the t-bolts are at the positions you marked. Tighten the star handled knobs tightly to secure the support tube to the platform.
-
Thang’s frame is collapsible to accommodate easier transport and storage. First turn off the power, unplug the motor from the electronics enclosure and remove the platform and electronics enclosure from the frame. Standing behind the support wheels, pull the front arm backwards until it meets the main arm. Place one foot on the rear arm horizontal pipe that covers the support wheel axle. Place one hand on the forward and main arm horizontal supports and press down slightly. Place the other hand on the mid-point of the aluminum rod at the bottom of the collapsible hinge and pull up with enough force to dislodge the rod from its position in the left and right teeth of the hinge. With the rod resting above the left and right hinge teeth push down and forward with the hand holding the front and main arm (keep your foot on the rear arm pipe). Thang should collapse down with the main and forward arm moving down toward the rear arm.
-
Thang's average rate of travel depends on the terrain, incline, load and the speed selected. The most commonly used speeds are 3 and 4 for straight line travel. Speeds 1 and 2 are used primarily when positioning Thang or maneuvering around corners and turns.
With a 100 pound load on level, firm terrain the approximate rates of travel (in feet per second & miles per hour) are:
Speed / FPS / MPH
1 / .92 / .63
2 / 1.9 / 1.32
3 / 3.2 / 2.17
4 / 4.0 / 2.75
-
The charge time depends on how much use the battery has between charges.
Charging after routine use takes 30 minutes to 2 hours.
To charge the Thang battery from a fully drained state takes 3 to 5 hours.
-
We recommend charging Thang after every use for heavy use days (heavier loads at distances over 1/2 mile) and every other use for light use days (light and medium loads traveling distances less than 1/2 mile).
Always turn the power switch on the outside of the electronics enclosure to the off position when not in use. This will decrease battery drain.
Thang’s battery will charge to 28 or 29 volts. You can see the charge level on the voltmeter affixed to the outside of the electronics enclosure. If the voltage drops below 26 volts you should charge the battery.
If you don't plan to use Thang for several months, we recommend recharging the batteries every 3 months while in storage.
-
➡Charging
- Always use the charger and adapter supplied with the battery.
- Always turn the power switch on the electronics enclosure off and when charging.
-Always disconnect the charger after charging.
- If you won't use Thang for long time, make sure to charge the battery every three months.
- Leave the electronics enclosure lid open while charging.
- Charge the battery in a well ventilated area.
➡Storage
- Store your battery in a cool and dry place (between 45° to 75° Fahrenheit).
- Don't leave the battery near a heat source.
- Colder and freezing temperatures will reduce battery performance, we recommend you keep the battery and electronics enclosure at room temperature until use If storing Thang in a non heated/airconditioned space such as a garage or shed, unplug the electronics enclosure from the motor and store it separately inside an environmentally controlled space and reattach for the next use.
➡Cleaning
- Never use a steam pressure washer when cleaning the battery (or Thang)
- Never immerse the battery in water.
-If the battery is removed from the electronics enclosure and gets dirty, wipe off battery with clean damp cloth i
-
You typically don’t need to connect or disconnect Thang’s 24V battery. An on/off switch on the electronics enclosure is provided to turn power on and off to Thang’s motor and circuit cards. Thang’s battery may physically be disconnected from inside the electronics enclosure by unplugging male and female connectors that come straight from the battery. To reconnect plug them back in (making sure to match positive to positive and negative to negative) .
-
Fully loaded (approx. 130 pounds) Thang can travel over 3 miles on single battery charge.
-
Yearly. Thang’s electric motor has four brushes that are sealed with plumbers putty. The brushes should be inspected, cleaned and replaced if damaged or worn and then resealed with plumbers putty.
Technical Info & Issue Resolution
-
Thang comes with a 24 Volt 10 amp hour Lithium Ion battery and charger. The Battery pack outer layer PVC material has the insulation, anti-corrosion and wear resistance characteristics to increase the life and protect the battery. The batteries provide stable performance. The built in battery management system provides battery balancing among the cells and includes over voltage, over current, overload, short-circuit, temperature and power protection.
Battery Specifications:
Nominal Voltage is 24V
Rated Capacity is 10AH
Battery cell types are 2500Mah Cells
Max charge voltage is29.4V
Battery Management System (BMS) Continue Discharge Current is15A.
Battery Dimensions: 5.12*3.55*2.76inch (130*90*70mm)
Lifecycle is 800-1000 Cycles
-
At the most commonly used speeds of 3 and 4, Thang's draws between 3.25 and 6.2 amps when hauling a load of 130 lbs on a level hard surface.
-
Thang has an aluminum Frame and stainless steel hardware. Connectors and carrying rails are made of PVC. Thang's flat platform is made of High Density Poly Ethylene (HDPE).
-
Thang’s electronics enclosure is made to shelter the battery and circuit card from weather. It is not submersible but can withstand indirect overspray from activities like washing down a kayak with the enclosure mounted to the bottom of the platform. Do not directly spray the enclosure with water or drop the enclosure.
The enclosure has a hard plastic shell and is padded on the inside. It can withstand minor impacts such as falling out of the one or two feet from the wire basket on the installed platform. Dropping the enclosure from higher distances or impacting it with other objects may damage the battery or circuit card so use the enclosure handle to carry it, ensuring it is fully closed and secure it safely while transporting.
Do not open the separate circuit card enclosure inside the electronics enclosure.
-
Thang’s electronics take 30 to 45 seconds to boot after turning the switch on the electronics enclosure on. After that you should be able to see it in your list of found Thangs when you click Find Thangs from the main screen. If you do not see your Thang in the list or if you are having issues connecting to it, try the following.
Turn off the power to the Thang unit using the switch on the electronics enclosure and wait 15 seconds.
Close the Thang mobile app.
Turn off the bluetooth on your phone.
Turn on the power to the Thang unit using the switch on the electronics enclosure.
Wait 45 seconds.
Turn on the bluetooth on your phone.
Open the Thang mobile app.
Select Find Thangs.
If your Thang is not found - wait another 15 seconds and try again.
If your Thang is still not found turn off the power to the Thang unit at the electronics enclosure switch.
Wait 10 seconds
Turn the Thang unit power back on and wait 45 seconds and repeat steps 5 through 9.
-
For general issues you can send a log file from your phone by clicking the three dots in the header of the phone app and selecting “Send Feedback”. This will open a dialog for you to write a message and provide a checkbox for you to include a log of your mobile app activity since the last time you opened the mobile app to a defaulted logs@thang.co email address. Once you enter your feedback and click Send Feedback your email shoud be activated with the feedback as the email message and the log file attached. You may add addressees before clicking send. For connection issues between Thang and the mobile app please see try the FAQ suggestions for connection issues in this section first.
-
This is typically an indication that you do not have enough pressure in your tires. Try inflating them to 4 lbs or in the case of very cold weather (causing the air and plastic hub to contract a bit) you may need to over-inflate the tires temporarily to 4.8 lbs. If the problem persists, friction tape can be applied to the plastic hub between the wheel and the hub (note this requires wheel removal and hub disassembly).
-
Tension from the rear arm connecting points to the arm joints on the left and right side of the Thang frame should be tightened if the collapsible hinge falls out of position when Thang is rotated forward on its drive wheels. Use a 1/4” socket and 7/16” wrench or two 7/16” wrenches to tighten the lock nut onto the bolts that hold each rear arm end between the plates of the left and right arm joint. Tighten them to the point that the rear arm raises and the collapsible hinge stays in position when Thang is rotated forward over the drive wheels. Do not overtighten to the point that the hinge becomes uncollapsible when using firm pressure. Note that if you do not plan to collapse Thang you may more permanently keep the rear arm in position by securing a bungee from the rear arm axle crossbar to the latch hole in the rear of the main arm horizontal support.
-
The star handled knobs that come with the support tubes and t-rail bolts typically hold well after they have seeded into the hdpe platform from a few uses, but if a tighter and more permanent connection is desired you may use a 1/4-20 lock nut instead of the star handled knobs to secure. You will need to tighten them with a 7/16” wrench or a the same size socket and ratchet. The same tools are required to remove the nuts when repositioning the support tubes if using the lock nut approach.
-
This is a symptom of overheating of the Thang electronics. To recover normal operation, turn off the power switch on your electronics enclosure and allow the Thang electronics to cool for ten to fifteen minutes. In extreme cases, you may need to remove the electronics enclosure from the platform and holding basket, open the lid and move the enclosure to an airconditioned space to cool it more quickly.
-
Version 2.0.00 and earlier firmware installed on the circuit card within the Thang electrical box has a known bug that causes some Samsung phones (S23 and above) to request pairing and connect but quickly disconnect. The fix for this is to upgrade the firmware to v2.0.01. Thang units sold before Feb 2025 came with v2.0.0 or earlier firmware unless the firmware has been upgraded. To determine the firmware of your Thang unit. Connect to it via the Thang mobile app and select About from the main menu. The firmware version should be displayed at the bottom of the screen. Contact Thang via the website contact page if you experience this issue and your Thang unit requires this firmware update. The update can currently be performed in the shop and will require the circuit card to be returned to the shop for the update.
-
Thang's motor/transaxle provides .271 peak horse power and .217 continuous (95% duty cycle) horse power. See the table at the bottom for more detailed information
Thang's motor/transaxle technical specification details